Switching JDK (Java) Versions in Mac OS X
Many times, we might need multiple versions of JDK for our work. though installing multiple JDK versions is easy, experiance of using them effortlessly is not so great. In this article, we will se how we can use all these SDKs effortlessly and switch them with ease.
Solution:
Before anything, we first need to know the different JDK versions already installed in our Mac. And to know those installed versions, you can simply use the below command.
/usr/libexec/java_home -V
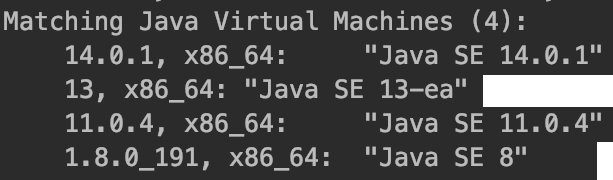
This will list out all the JDK versions installed in your Mac along with their corresponding path. Here is a sample, how it looks:
Matching Java Virtual Machines (4):
    14.0.1, x86_64:     "Java SE 14.0.1"        /Library/Java/JavaVirtualMachines/jdk-14.0.1.jdk/Contents/Home
    13, x86_64: "Java SE 13-ea" /Library/Java/JavaVirtualMachines/jdk-13.jdk/Contents/Home
    11.0.4, x86_64:     "Java SE 11.0.4"        /Library/Java/JavaVirtualMachines/jdk-11.0.4.jdk/Contents/Home
    1.8.0_191, x86_64:  "Java SE 8"     /Library/Java/JavaVirtualMachines/jdk1.8.0_191.jdk/Contents/Home
Notice that, I have four JDKs installed in my Mac (8, 11, 13 and 14).
Now let’s see how can we switch them easily. And to make all these JDKs accessible, we need to know their paths. To get the each of these JDK paths individually use the below command.
/usr/libexec/java_home -v<installed_java_version>
For example, to know the path of JDK 14, the command should be:
/usr/libexec/java_home -v14
Now we need to make sure these paths are set to system path with a simple command. And to do that, follow the below steps:
- Open .bash_profile using any of your favorite editor. (I am using
vi)vi ~/.bash_profile - Press
Ito move it to edit mode. - Export their paths as mentioned below:
# Java Homes for different JDK Versions for allowing them to switch easily export JAVA_8_HOME=$(/usr/libexec/java_home -v1.8) export JAVA_11_HOME=$(/usr/libexec/java_home -v11) export JAVA_13_HOME=$(/usr/libexec/java_home -v13) export JAVA_14_HOME=$(/usr/libexec/java_home -v14) - Create alias for all of them as mentioned below:
alias java8='export JAVA_HOME=$JAVA_8_HOME' alias java11='export JAVA_HOME=$JAVA_11_HOME' alias java13='export JAVA_HOME=$JAVA_13_HOME' alias java14='export JAVA_HOME=$JAVA_14_HOME' - Set a default JDK version as mentioned below:
export JAVA_HOME=$JAVA_8_HOME - Save your changes by typing
:wq!and pressEnter.
And you are done.
Conclusion:
Now to use any JDK verisons in your Mac is just a single command away. Let’s say, we want to use JDK 11 for some work. We can easily do it just with the command java11.
Here is a sample command flow of it’s work:
chansek$ java11
chansek$ java --version
java 11.0.4 2019-07-16 LTS
Java(TM) SE Runtime Environment 18.9 (build 11.0.4+10-LTS)
Java HotSpot(TM) 64-Bit Server VM 18.9 (build 11.0.4+10-LTS, mixed mode)
chansek$ java14
chansek$ java --version
java 14.0.1 2020-04-14
Java(TM) SE Runtime Environment (build 14.0.1+7)
Java HotSpot(TM) 64-Bit Server VM (build 14.0.1+7, mixed mode, sharing)
NOTE: This was copied from a StackOverflow answer for my future reference: https://stackoverflow.com/questions/26252591/mac-os-x-and-multiple-java-versions